Switch for a pricing table in Oxygen using code from W3Schools
What's a price switcher?
So you've made a beautiful pricing table for your product or service but you want a switch to show prices per month rather than per year or a switch to show prices in a different currency. How do you do it? Easy. Grab the code from somewhere else. But before we begin take a look at our websites page to see one we put in the oven earlier
Why not use a third party script?
You can achieve effects like this using Tweenmax (and probably more) but if possible I like to keep things within Oxygen builder and if you're not loading up big script libraries (of which you'll use only a small part) then your overall page size will be needlessly large. It's much easier just to use a bit of jQuery.
A very simple example - a shrinking logo and header
This is what we'll be making: https://www.marketing365.com/test-content
Note, that I'm not a programmer. Better code is probably possible but if I can do it, then anybody can!
In this example, we'll animate a logo.
Step 1, make the template
Make a template and create a normal header in Oxygen. You can use the header builder or not. Make sure you add an inner content section to your template (under add - basics) and you have some content to preview. You'll need this as you'll need to test scrolling down. If you have no content then you can't scroll down.
Add the class "shrinklogo" to the logo. Add the class "fixheader" to the whole header.
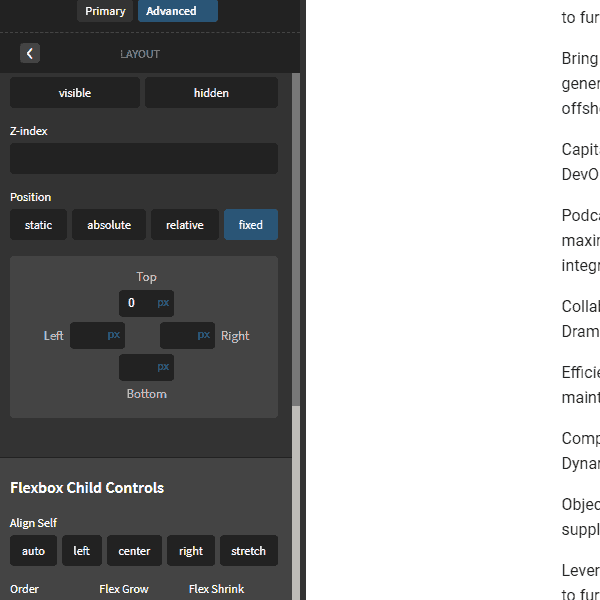
Make the header fixed in Oxygen by going to Advanced - Layout - Position - Fixed. Also put it at the top of the page by putting 0px at the top of the position.
Important: Make sure you add a height to the logo and the header. Later we'll be animating the header height of these elements and if you don't start with a value, then it won't work.
In this example, I use 180px for the header and 96 for the log.
Step 2, the jQuery
Now we add the jQuery. Add a code block. Add - Basics - Code Block - JavaScript. And add the following code:
jQuery(document).ready(function(){

jQuery(document).scroll(function () {
var y = jQuery(this).scrollTop();

if (y > 180) //if scroll is great than 180 do the following
{

jQuery(".fixheader").css({"height": "100px", "top": "0px",});
jQuery('.shrinklogo').css("height", "80px");
}

//now the opposite

if (y == 0)
{

jQuery(".fixheader").css("height", "180px");
jQuery('.shrinklogo').css("height", "96px");

}

})
});
Let's take a look at the code quickly
We wrap everything in document ready to ensure that our code only loads up once the document is loaded so we optimise our load times.
Then we have a scroll function which means only when we scroll will we see the results and then we have a variable y which is the distance from the top.
That's the basis for a lot of stuff we can do. It says when you start scrolling measure the distance from the top. From that we can use if statements to do what we want.
With that in mind, the rest should be quite easy to see, we simply have if statements and we use the jQuery css function to inject css into our html elements.
You could also do this with the toggleclass function which is probably better and neater code but I prefer this method as I have less classes to remember.
Step 3, the CSS
Now your logo and heading will shrink but they won't animate nicely, this is because you haven't applied a transition. In this case we'll keep it fairly simple and apply the same animation to the expanding and shrinking parts.
If you don't have one already, add a custom stylesheet by going to Manage - Stylessheets - Add sytlesheets and add the following CSS:
.fixheader, .shrinklogo {
    transition: all .5s cubic-bezier(0.785, 0.135, 0.150, 0.860);
       }
Let's take a look at the css quickly
We define the behaviour for the classes fixheader and shrinklogo together because we want them to have the same animation.
Here I've used 'all' meaning that all properties (e.g. height, width etc) will animate in the same way. And I have chosen a speed of .5 seconds and an animation that's faster at the end.
To choose the animation that is right for you, I strongly suggest this site:
https://matthewlein.com/tools/ceaser
I hope you find the above tutorial. Using the same basic ideas you should be able to animate your headers any way you want all without any external code libraries.